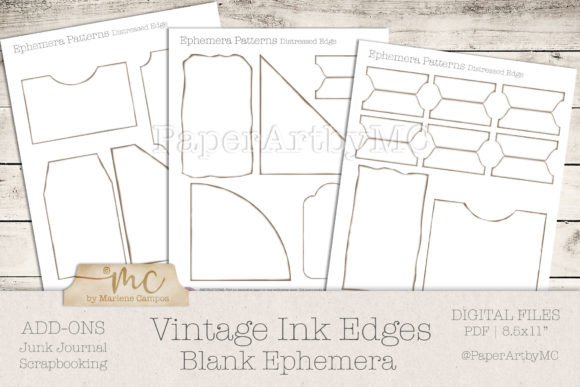
Unlocking Creative Potential with the Vintage Ink Edge Blank Ephemera Template
There is a distinct satisfaction in holding a piece of paper that feels like it has traveled through time. The Vintage Ink Edge Blank Ephemera Template offers exactly that aesthetic, providing a foundation for junk journals, scrapbooks, and mixed-media art that feels authentic and lived-in. However, moving from a digital download to a tangible, high-quality physical product requires more than just hitting the "print" button. Many creators, whether you are a seasoned entrepreneur selling handmade goods or a hobbyist documenting your life, often overlook the technical nuances that transform a good print into a professional-grade element.
This guide is designed to help you navigate the printing and assembly process effectively. By understanding the common pitfalls regarding paper weight, printer settings, and file handling, you can ensure your final projects look as impressive as the design itself.
Understanding the Value of High-Resolution Digital Ephemera
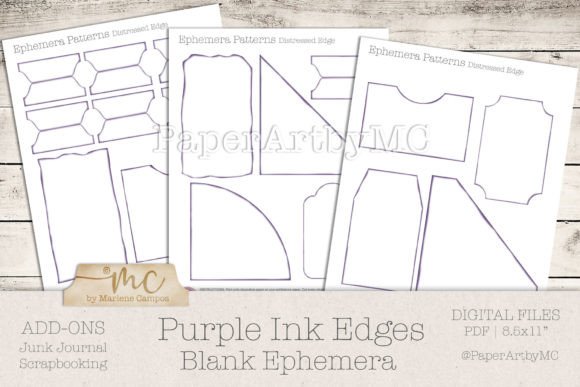
The core appeal of this kit lies in its versatility. It includes three sheets packed with pockets, tags, and torn paper tabs, all featuring those sought-after inked edges that mimic antique documents. Because these files come in high resolution, they are ready for immediate use without needing alteration. This is a significant advantage for users who may not have advanced graphic design skills. You do not need to add textures or distress marks manually; the work is already done digitally.
However, a common misunderstanding is assuming that "high resolution" guarantees a perfect print regardless of the medium used. The digital file is only half of the equation. The interaction between the ink, the paper, and the printer mechanics determines the final outcome. Ignoring this relationship often leads to results that look flat, blurry, or mechanically stiff, defeating the purpose of the vintage aesthetic.
Critical Mistakes in Paper Selection and How to Avoid Them
The most frequent error creators make is choosing the wrong paper weight. When working with ephemera intended for pockets, tags, and interactive journal elements, structural integrity is key. Many beginners reach for standard copy paper (usually around 80 gsm) because it is readily available and inexpensive. This is a costly mistake in terms of time and quality.
Standard paper is too flimsy for tags that will be pulled out and examined frequently. It tears easily, curls when glue is applied, and allows ink to bleed through to the other side, ruining the back of the sheet. For the Vintage Ink Edge Blank Ephemera Template, the recommendation is specific: use white paper between 120 and 180 grams. While 120 gsm opaline paper works, aiming for 160 to 180 gsm provides a superior feel. This heavier stock mimics the cardstock used in vintage correspondence, offering a satisfying stiffness that makes tags durable and pockets functional without collapsing under the weight of inserted items.
The Impact of Printer Settings on Vintage Aesthetics
Even with the perfect paper, incorrect printer settings can degrade the quality of your print. A widespread oversight is neglecting to adjust the resolution and paper type settings within the printer driver. Most home printers, including popular HP models, default to "Plain Paper" and "Draft" or "Normal" quality to save ink and speed up the process.
When printing detailed ephemera with subtle ink variations and edge distressing, these default settings are insufficient. They often result in banding (visible lines across the image) or muted colors that lack the depth required for a vintage look. To correct this:
- Navigate to your printer properties before printing.
- Explicitly select the paper type that matches your chosen stock (e.g., "Cardstock," "Heavy Paper," or "Matte Photo").
- Set the print quality to "High" or "Best." This slows down the printing process but ensures the ink is deposited evenly, capturing the fine details of the ink edges.
Furthermore, always verify the paper size settings. Even though the files are formatted for standard 8.5x11 inch paper, some software may attempt to "fit to page," slightly shrinking your design and creating unwanted white borders. Ensure the scaling is set to 100% or "Actual Size."
Navigating Double-Sided Printing Challenges
One of the most complex aspects of using this kit is achieving clean double-sided prints. The template includes designs meant to be printed on both sides of the sheet to maximize utility and realism. However, home printers vary significantly in how they handle duplex printing. A common frustration is misalignment, where the front and back images do not line up perfectly, resulting in crooked tags or pockets that are difficult to cut.
To avoid wasting expensive heavy-weight paper, always run a proof test. Print a single sheet on standard, cheap paper first. Hold it up to a light source to check the alignment. If the registration is off, you may need to adjust the margins in your PDF viewer or manually flip the pages if your printer does not support automatic duplexing. Remember that every computer and printer combination has slight variations; what works on one machine may not work on another. Taking five minutes to test can save you an entire ream of premium paper.
Maintenance and Professional Alternatives
Sometimes the issue is not the settings or the paper, but the hardware itself. Faded prints or streaks often indicate low ink levels or clogged nozzles. Before starting a large batch of ephemera, check your ink levels and run a nozzle check pattern. If the black ink looks gray or washed out, the vintage effect will be lost, making the document look merely dirty rather than artistically aged.
If you do not have access to a high-quality color home printer, or if your current machine struggles with heavy cardstock, consider visiting a local copy center or print shop. This is often a better approach for small business owners or serious hobbyists. Professional shops utilize industrial-grade printers that handle 180 gsm paper effortlessly and offer superior color accuracy. While there is a cost involved, the reduction in wasted materials and the elevation in final product quality often justify the expense. It is a strategic decision that prioritizes efficiency and presentation over the convenience of home printing.
Final Assembly and Cutting Techniques
Once your sheets are printed correctly, the final step is cutting. The instructions specify to "Print and Cut by hand." While this might seem tedious compared to using a die-cutting machine, hand-cutting is actually essential for this specific style. The Vintage Ink Edge Blank Ephemera Template relies on organic, imperfect shapes. Using a sharp pair of scissors or a craft knife allows you to follow the torn paper aesthetics naturally. Mechanical cutters can sometimes leave edges too clean or crush the fibers of thick paper, so embracing the manual process enhances the handmade charm of your junk journal or scrapbook projects.
By paying attention to these details—paper weight, printer calibration, alignment testing, and cutting methods—you transform a simple PDF download into a collection of cherished, usable art pieces. Whether you are creating gifts, selling products, or preserving memories, these small adjustments ensure your work stands out with professionalism and heart.